Analyze Optimize Succeed

How We Do Our Work Plan
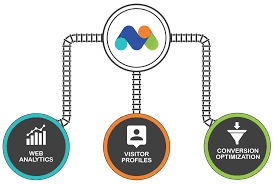
Tracking Website Traffic with Matomo
Analyzing User Behavior & Engagement
Generating Actionable Insights
Optimizing Conversions with Privacy-first Analytics

Empowered by technology,
driven by analytics.
At MatomoExpert we are proud of our long list of great projects. To date, we have completed more than 250 projects. As Matomo experts, we bring our skills to every job to ensure we get great results. Our team works hard to provide our customers with complete solutions and uses the power of web analytics to give them information they can use.
- We know how to tailor our services to your needs, whether it's creating special reports, event tracking, e-commerce order tracking, funnel tracking, or goal tracking.
- With MatomoExpert, you can rely on our proven track record and industry-leading experience to help you achieve your business goals.
Meet Our Experts
Hafiz Naser Aslam
CEOAreesha Allah Ditta
Senior DeveloperSadaf
DeveloperWhat Can We Offer
Matomo Setup
Are you looking to set up Matomo on your website? Look no further. Matomo Expert is here to guide you through the seamless and efficient setup process.
Matomo Optimization
Is your Matomo Optimization installation running slowly or experiencing performance bottlenecks?Our team at MatomoExpert...
Matomo Maintenance
Elevate your analytics game to extraordinary heights with MatomoExpert’s unrivaled maintenance services.
Custom Event Tracking
Imagine having the ability to custom event tracking and analyze every button click, form...
Custom Report Generation
Custom report generation leads to understanding your business’s generic report falls short.
Funnel tracking
MatomoExpert is your trusted solution for gaining a comprehensive understanding on your website...
Goals tracking
Goals Tracking is a cornerstone in optimizing your analytics strategy, offering profound...
Heatmap and Session Recording
Our heatmap and session recording services are designed to provide you with valuable...
Custom Dimensions tracking
Custom dimensions and custom metrics are like your Analytics account’s basic dimensions...
250
Projects Completed
5+
Expert Technicians
200
Happy Customers
15
New projects
Our Projects
What People Say
We met years ago at a data-driven marketing firm, where we learned countless best practices in technology and analytics—along with a few pitfalls to avoid.
Contact UsHave a defferent question?
Maximize Matomo with expert help. We offer custom setup, event & goal tracking, e-commerce, funnel analysis, GA data migration, ad tracking, and full optimization. 200+ projects done—book a session today!


